The sample letter I
When the cards are fitted with the four warp threads and warped onto the weaving frame, the weaving can begin.
But how?
The simplest method is to always move the cards forward, all together. The pattern repeats itself
continuously. You don't need to concentrate and depending on your choice of colour it can look quite pretty.
If the warp threads behind the cards are then so twisted that further weaving is almost impossible,
reverse the direction of rotation of the cards. A slightly different pattern emerges.
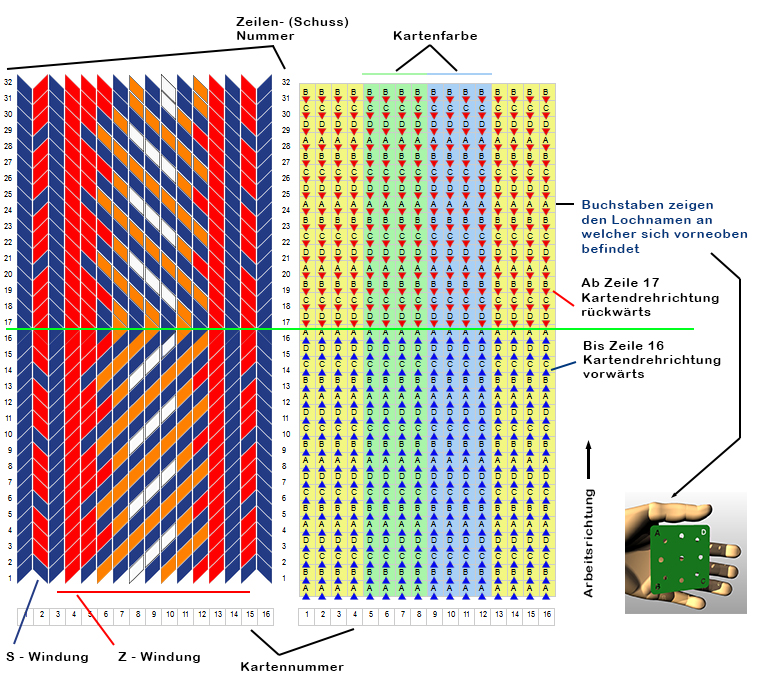
In the diagram below you can see a sample letter with all cards turning the same way. Up to line 16 forwards, then backwards.
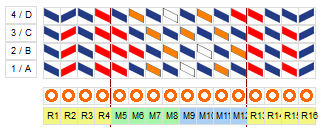
The sharpening letter on which the above sample letter is based can be seen on the right. The card colour serves as a guide for me. You can also freely choose the hole designations. That is why the devinition is important, so that one can understand the assignment.
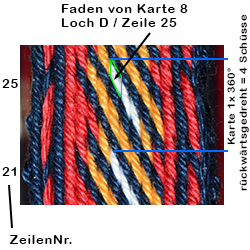
On the right you can see a section of the woven ribbon. In the sample letter, the cut-out begins at the top of line 20 and ends at line 26. According to the warping certificate, the white thread of card 8 is threaded in hole D. The warping certificate also states that card 8 is in S warping. The warping certificate also states that card 8 is in S - warping. Since the winding at position 25 is an S winding, the card must have been turned backwards.
See:
Twists & Turns.


